Use the xcolor package to add some colour to your document. Stick with primary colours for the moment, or read the xcolor documentation to see all the named colours available.
Use the geometry package to change the margins.
Reprocess and print your document if you have a colour printer (monochrome printers should print it in shades of grey).
Your support for our advertisers helps cover the cost of hosting, research, and maintenance of this document
Formatting Information — An introduction to typesetting with LATEX
Chapter 3: Plugins and support
Section 3.1: Using classes and packages
In this section…
You should be familiar with this by now from earlier chapters.
3.1.1 Using a document class
We’ve already seen how to do this in § 2.1.1 above: it’s the document class name that you put in curly braces in the \documentclass line at the start of a LATEX document.
\documentclass{book}Most classes have options (we saw some in use in the Quick Start document in § 1.4 above). The class documentation will explain what they are for and how to use them. Read it!
3.1.2 Using a package
To use a specific package, put its name in the argument of a \usepackage command in your Preamble, eg to use the Noto typeface:
\documentclass{book}
\usepackage{noto}
\begin{document}
...
\end{document}
Note
See § 3.2 below for how to install extra packages that weren’t automatically installed with your distribution of TEX.
For another example, to use the xcolor package, which lets you typeset in colours (I warned you this was coming!), you would type:
\usepackage{xcolor}This makes available the \color command and many others, and several sets of predefined palettes of colours which you can specify using options.
You can include several package names in one \usepackage command by separating the names with commas, and you can have more than one \usepackage command.
If the package has options that you want to use, you must give the package its own separate \usepackage command, like geometry and xcolor shown below. How do you know if a package has options and what they are? Read the documentation!
\documentclass[11pt,a4paper,oneside]{report}
\usepackage{fontspec,graphicx}
\setmainfont{TeX Gyre Pagella}
\setsansfont{TeX Gyre Adventor}
\usepackage[svgnames]{xcolor}
\usepackage[margin=2cm]{geometry}
\begin{document}

\title{\sffamily\color{Crimson}Practical Typesetting}
\author{\color{SlateBlue}Peter Flynn}
\date{\color{ForestGreen}January 2022}
\maketitle

\end{document}
(Incidentally, don’t actually do it this way: it’s a very crude and cumbersome way to do colours in titling, and I only did it here for brevity. It’s fine for a one-time short document, but it will interfere with running heads if you use them; and if it’s for a repeatable style we’ll see in Chapter 7 ‘Programmability’ below how it can be automated as part of the \maketitle command and kept out of the author’s way.)
Exercise 3.1 — Add colour and change page shape
The geometry package has options to let you specify margins, page and paper sizes, header and footer depths, and a lot of other page-geometry dimensions. The xcolor package has options to let you specify which of several standard palettes of colours you want to use.
It’s really important to read the documentation for the package concerned to find out what can be done and how to do it: see § 3.1.3 below.
3.1.3 Package documentation
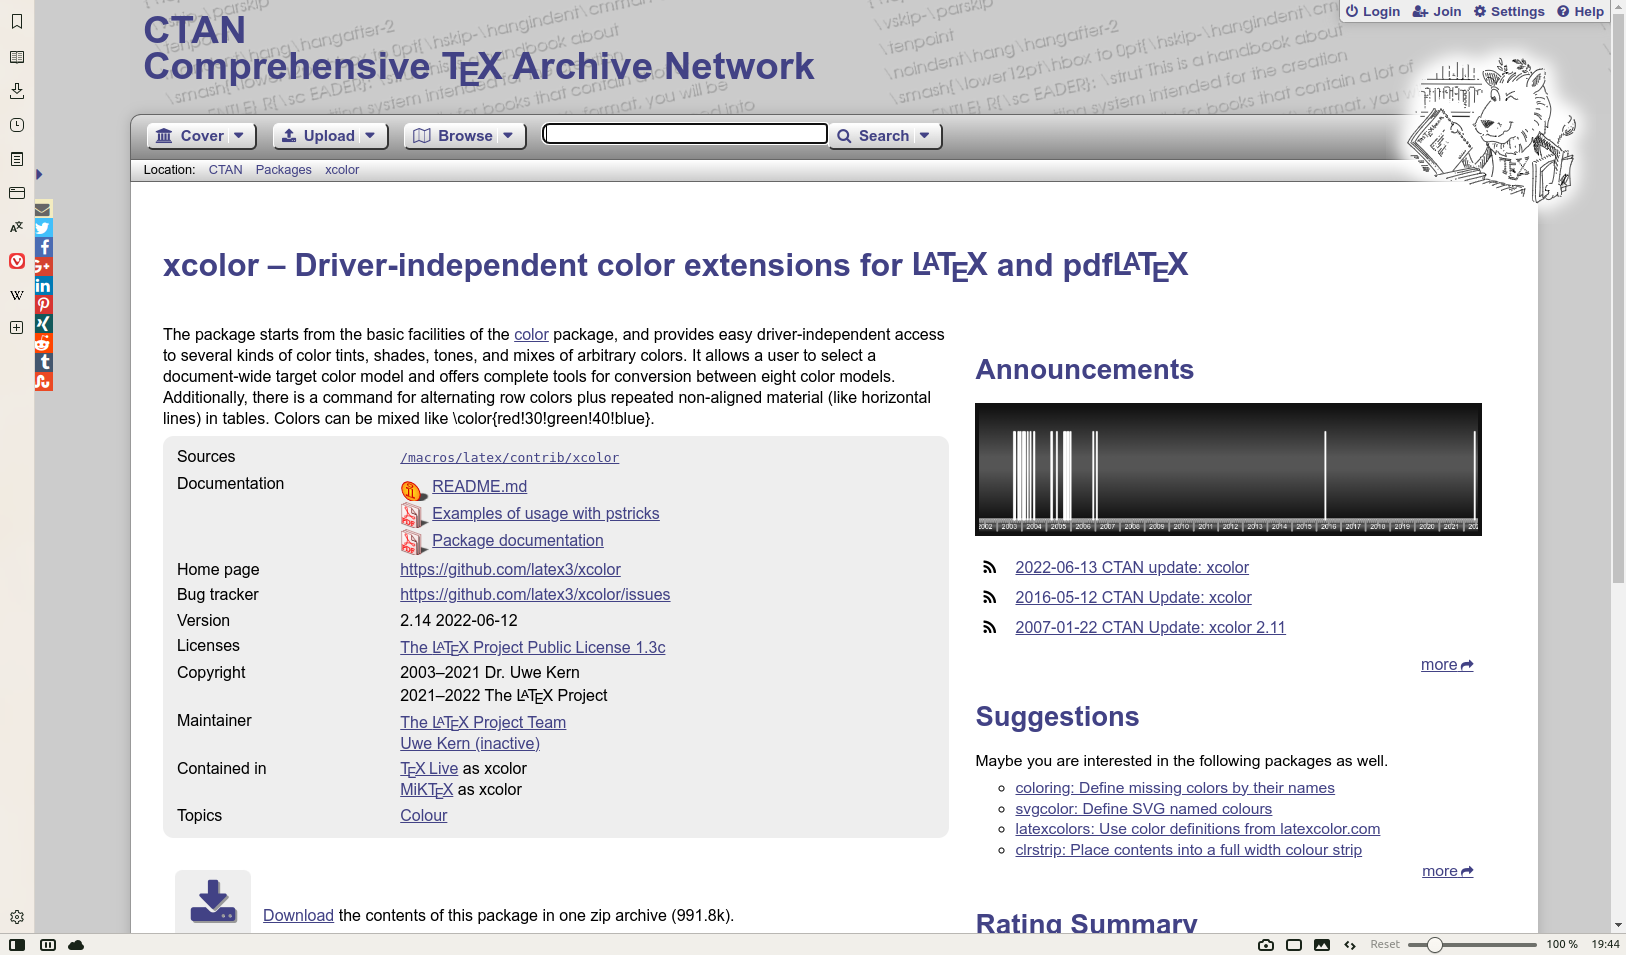
To find out what features a package provides (and thus how to use it), you need to read the documentation. The simplest way is to search the web for CTAN followed by the package name. The top link should be the package folder on CTAN where you can click on the PDF where it says Package documentation (see Figure 3.1 below).
Alternatively, use your terminal (command) window and type texdoc followed by the package name. This will open your local copy of the documentation in your PDF viewer — assuming you have the package installed. You could also use your system’s file finder to look for the package name — it should turn up the package directory itself as well as the documentation directory — what you’re looking for is a PDF document.
If that doesn’t find it, in the texmf/doc/latex directory of your installation there should be subdirectories of .pdf files, one for every package installed, which you can view or print. If your installation did not include the documentation, it’s all on CTAN in http://www.ctan.org/pkg/ followed by the package name as shown in Figure 3.1 above.
Before using a package, you should read the documentation carefully, especially the subsection usually called ‘User Interface’, which describes the commands the package makes available. You cannot just guess and hope it will work.
See the next section for details of how to generate the documentation for additional packages you install yourself.
Exercise 3.2 — Read all about it
Find and view (or print) the documentation on the xcolor package you used in the example ‘Add colour and change page shape’ above.
Find and view (or print) the documentation on the geometry package you used in the example ‘Add colour and change page shape’ above.
Browse some of the other package documentation installed on your system.

